
I love snowflakes – even the real kind! I especially love designing with Snowflakes & Sparkles. They are so pretty that it helps me get through the cold winter months!
 This card, inspired by my sideline, Mary, has so much glitter. You can’t stop smiling, just be looking at it!
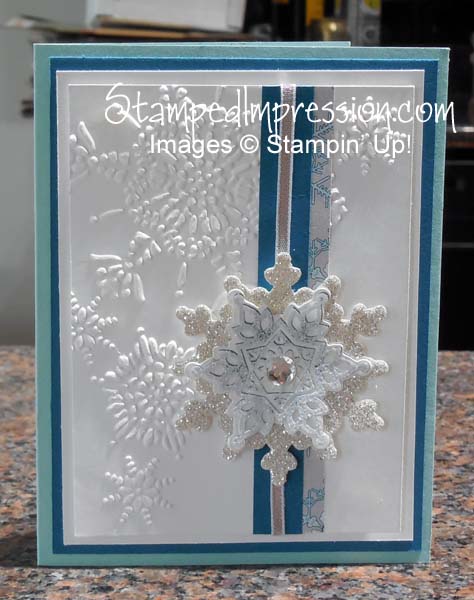
I started with the Festive Flurry Bundle, which contains both the stamp set and the corresponding Framelit dies. Colors are primarily Pool Party, Island Indigo and Whisper White.
The central snowflake has 3 layers. The top 2 are the smallest size, while the third one is the next size.
The smallest snowflake was stamped on a Window Sheet with White Craft Ink. I also applied Iridescent Ice Stampin’ Emboss Powder. I also stamped a snowflake with Island Indigo ink on whisper White card stock. Both snowflakes were run through the Big Shot and glued together, aligning the shapes. I glued them together with just one glue dot in the center. Then I made the largest snowflake by running the Silver Glimmer Paper through the Big Shot. I attached the top snowflakes to the largest one using Stampin’ Dimensionals. I then glued a Large Rhinestone Basic Jewel in the center for the Wow!
All the sparkle makes the snowflake look like a million dollars. It’s also so easy to make, while looking ever so much more complicated!
Another feature which adds interest and depth to the card design, while keeping it easy to make, are the layers of white card stock. Using two layers of one color is an elegant way to create depth in the design.
I just love snowflakes. It’s so much fun (and easy!) designing with snowflakes and sparkles!
Gorgeous card!!
Thank you! In fact, it ended up being my favorite card this year. So, I wrote a note in it and gave it to my husband on Christmas Eve. He liked it, too!
Happy New Year!