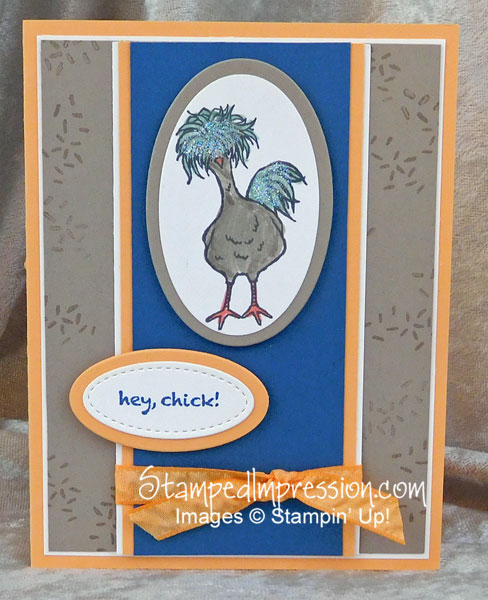
Miss you Blue Hair Chick! It seems like days and days since I last posted a photo of you. You can see a couple of cards I made with the Hey, Chick stamp set here.
Miss You Blue Hair Chick!
The first thing you might wonder is why in the world did I ever decide to color her (or is it “him”?) with blue hair. The answer is that I love the color blue. And THAT is the best reason ever!
The 4-1-1
- Take the time to let your ink dry – First I stamped the chick using Basic Black Archival ink and let it dry well. I colored her/him with my Stampin’ Write Markers and let that dry even better. In fact, I let it dry until I completed and assembled the entire card. Then I added the glitter, so it wouldn’t smear the ink. Patience is a virtue. And it makes for better hand stamped cards!
- One Stamp. Two Uses – Can you figure out how I made the chicken foot prints on the card front? I used the cup cake sprinkles from Sprinkles of Life stamp set! Would you have thought of that? Award me a point for creativity!!
- At least 6 layers in my card design – When I first started to make cards, I was taught that every card should have at least 6 layers. Excluding the die-cut ovals, this card has 6 layers of cardstock, 2 layers of oval cardstock, 1 layer of ink on the Tip Top Taupe cardstock, 1 layer of ink on the top oval, 1 layer of glitter, and 1 layer of ribbon. Phew! That makes 11 layers! Definitely meets the minimum requirement.
Here are the supplies I used to make this card:
By the way, you can earn the Hey, Chick stamp set for FREE during Sale-A-Bration! Spend $50, before shipping and sales tax, and this is one of the Stampin’ Up! products you can choose for FREE!
My Favorite?
So what’s my favorite part of this card? Well, probably the chickie. I love her!! Or him!!
Maybe it’s the glitter or ribbon.
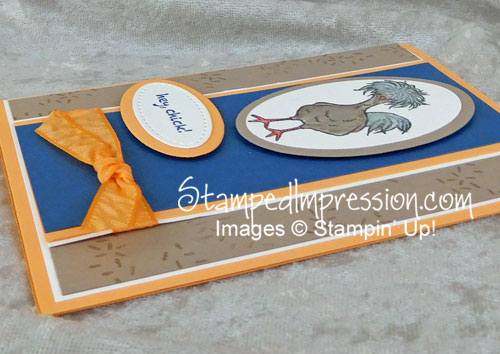
Nope, it’s the use of Stampin’ Dimensionals. They really make the blue-haired chick pop!
But, whichever way you look at this card, I can definitely say, “Miss you blue hair chick!“


