
I prefer to stamp with ink. Don’t you? But sometimes it’s fun to try other liquids. Today I chose to stamp flowers using bleach. Take a look.
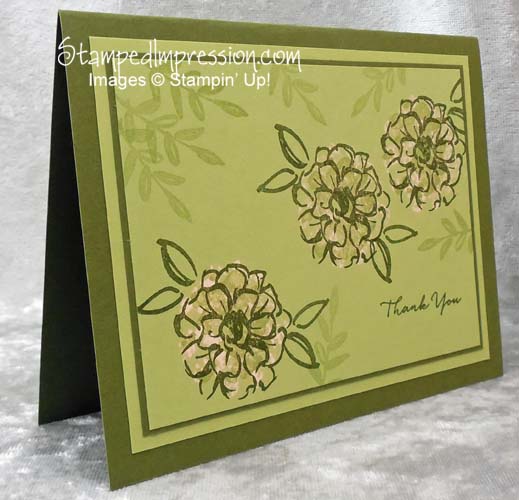 The stamp set used is What I Love, a set you can earn for free during Sale-A-Bration! The cool thing about this set is that it uses 3-Step Stamping! It’s a great way to add dimension to your projects.
On this particular card, I started at the level with the fullest coverage, using bleach instead of ink. To create the “ink pad” I folded a paper towel in 4 and placed it on a plastic dish. Then I poured a little bleach over the paper. To stamp, I lightly “inked” the stamp on the bleach pad and stamped on the card stock in the usual way.
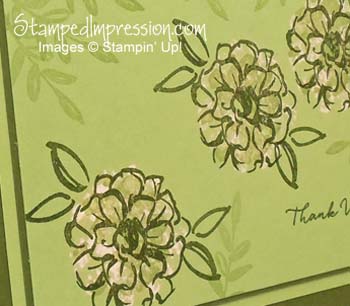
The main “Gotcha” is that you must allow the bleach dry. The length of time depends on how wet the stamp is. I left my card stock to dry for 1 hour!
If you stamp the next layer too quickly, then you’ll affect the color of that ink.
The color of the bleached images varies from card to card, depending on how much bleach is stamped on it. I made 10 cards of this design. Each one looked a little different! How cool is that? I meant to show a photo but I was super excited about them and already sent them out. but if you look closely at 2 flowers you can see how the colors vary.
 On this card, my card stock was Pear Pizzazz and Mossy Meadow. The next colors I chose for the stamped flowers were also Pear Pizzazz and Mossy Meadow. Repeating the colors made the overall design cohesive and even a little relaxing. Keeping one of the dark mats thin is another way to add dimension to the design.
Anyway, give this technique a try. Stamp flowers with Bleach instead of ink!
