
Today I’m exploring how to add dimension to your fall card design. The best thing about it is that I used everyday Stampin’ Up! products to achieve it!
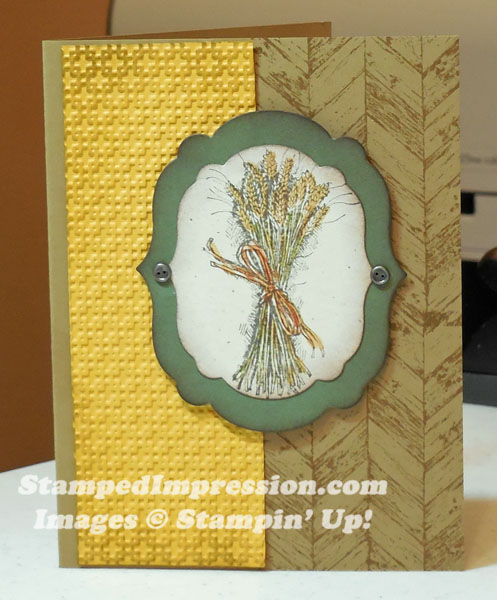 I started with the card base, where I stamped the wooden background on one side. The image is from the Truly Grateful stamp set in the new Holiday catalog. With the help of my trusty Stamp-A-Ma-Jig, I lined up the wood grain so that there wasn’t a gap in the design. (Note: I use my Stamp-A-Ma-Jig nearly every day!)
The yellow card stock was run through the Big Shot die-cutting machine with the Square Lattice Textured Impressions Embossing Folder. I sponged the top and bottom edges for even more dimension.
Of course the center piece has more sponging. The image was stamped using the Many Marvelous Markers, and shading always helps. A little more sponging was added!
Finally, my favorite go-to item – Stampin’ Dimensionals!
Colors use on this project are Baked Brown Sugar, Crushed Curry and Always Artichoke.
So quick as can be, I added lots of dimension to this fall card. It’s easy. Try it!
