
What? Happy Birthday, Happy Birthday! Did I write that correctly? Of course! On June 27, 1859, Happy Birthday was first sung. So, here’s a birthday card to celebrate!
 All right, this card was NOT made to celebrate the song. I made it for my husband, whose birthday was yesterday. But I didn’t want to post it too early….
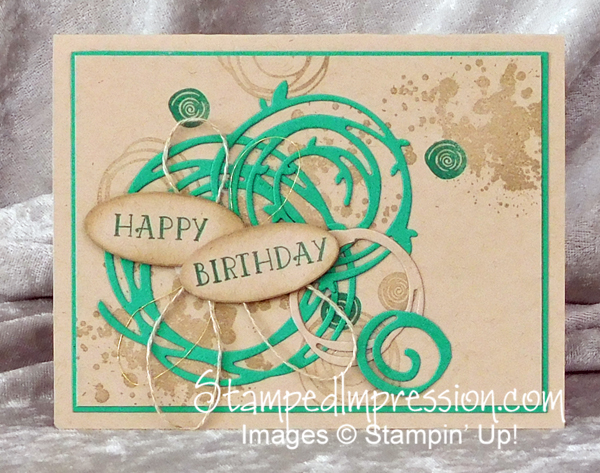
We’ve been doing a lot of gardening these days, so this card illustrates what we’ve been up to LOL. There is lots of smudgy Crumb Cake to represent the dirt in the gardens. Of course, the Cucumber Crush represents all the plants that are happily growing in our gardens! Because this is a masculine card design, I omitted all the colors of the flowers in bloom! Or about to bloom.
Like so many of my masculine cards, I started with Gorgeous Grunge in the background. Sometimes I worry about using this stamp set so much. But it never looks the same twice in a row, so I go with it. I also added some stamped swirls from Swirly Bird, one of the most fun stamp sets in the new catalog. Have you seen it? Have you used it? Talk about inspiring creativity. But I digress…
Here are some pertinent details.
The 4-1-1
- Cut up Framelits – I used 3 different sized circle-swirls – Yes, that’s a technical term – on the card. But I found that it was “too much”. I don’t know how to define “too much”, but I know when I achieve it. But I needed the third green circle. So, I cut off some of the lines. I also did that to the small brown circle. Ahhhh. Just the right amount of color and swirl!
- The Silicone Craft Sheet is the most useful tool – This mat keeps your work surface clean and controls wild adhesive. Use when applying adhesive to any small or thin item. On this card, I used a second mat. Once the thin card stock was placed on my card, I lay the second mat over it and pressed down. It helped attach the card stock really well. And if extra adhesive was trying to ooze out, the top silicone craft sheet picked it up. No extra glue on my card front!
- Skip the unnecessary embellishments – I added some Linen Thread to the back of the punched sentiments. Then I added a little Gold Metallic Thread. Such a complete waste. You don’t notice the gold thread. It adds nothing to the look, feel or design of this card. But it was already stuck down. So I left it. You see, we all have lessons to learn about card making every day!
So, what do you think? I like it. Most importantly, my husband likes it. That’s really all that counts. But I’d love to hear what you think. Feel free to leave a comment and let me know.
Hmmm. Maybe I should make a simpler version of this card for #imbringingbirthdaysback.
In the mean time, I’ll sing Happy Birthday, Happy Birthday! one more time!

Love love love this card!!!! I will be copying this!
Thank you! The best part of this card design is because it is a collage, there really isn’t a right and a wrong way to make it. My husband loved it! (I made it for him.) Plus, he was truly impressed with all the work I put into it!! Since it came together so easily, it was definitely a Win-Win!!! Thanks again!